Note to self: Compile kdepim with Mobile UI

Some month ago, I got a Samsung Slate 7 Tablet PC on which I am using Fedora as my main OS. The only thing that bothered me a little was that the built-in e-mail client cannot be comfortably used via touch input. Thus, I compiled kdepim manually in order to get the mobile UI as well. These are the steps I did to compile kdepim with the mobile UI:


sudo yum-builddep kdepim

# Download kdepim source from http://quickgit.kde.org/?p=kdepim.git
http://quickgit.kde.org/?p=kdepim.git&a=snapshot&h=5cf4021c72d1b0986645692e3f8cab61295d2ce9&fmt=tgz

tar xf kdepim-*.tar.gz
cd kdepim
cmake -DKDEPIM_MOBILE_UI:BOOL=ON

# Only mail
#cd mobile/mail
# Other mobile as well
#cd mobile

make
sudo make install
Posted in Snippets | Tagged , , , , , | Leave a comment

Plasma Active 4 for Nexus 7 (2012) and Archos G9

Some days ago, Plasma Active 4 was officially announced. Great thanks to all the people who worked so hard on this release. 🙂

Today, I could squeeze in some time to create PA 4 rootfs tarballs for Nexus 7 (the 2012 version) and Archos G9. The rootfs tarballs and the .ks files can be downloaded from here.

Please note that I could only test the Nexus 7 version yet. I hope that the Archos G9 version works as well.

For convenience, here is a summary of the installation instructions for Nexus 7:

wget http://files.kde.org/plasma/active/3.0/images/nexus7/moslo-nexus7-0.0.15.3.tar.gz
tar xf moslo-nexus7-0.0.15.3.tar.gz
cd moslo-nexus7

# Reboot/turn on the Nexus 7 by keeping the power button pressed and
# keep the volume down button pressed at the same time.
# Wait until the screen shows "Start" and then connect the Nexus 7 to the computer via USB.

sudo fastboot -c "console=tty1" boot zImage-moslo initrd-moslo
# Wait until moslo has booted.
# Replace /dev/sdX with the respective device, e.g., /dev/sdb.
# You can check with, e.g., dmesg what the id of the newly conntected device is.
sudo mkfs.ext4 /dev/sdX
sudo mount /dev/sdX /mnt/foo
wget http://files.kde.org/plasma/active/4.0/images/nexus7/plasma-active-4-armv7hl-google-nexus7.tar.gz
sudo tar xf plasma-active-4-armv7hl-google-nexus7.tar.gz -C /mnt/foo
cp /mnt/foo/boot/zImage /tmp/
sudo sync
sudo umount /mnt/foo

# Reboot the Nexus 7 by keeping the power button pressed and
# keep the volume down button pressed at the same time.
# Wait until the screen shows "Start".

# Please note: for the non 3G version replace /dev/mmcblk0p10 with /dev/mmcblk0p9
sudo fastboot -c "root=/dev/mmcblk0p10 ro console=tty1 rootwait rootfstype=ext4" flash:raw boot /tmp/zImage

# Disconnect the USB cable and press the power button.

Unfortunately, there is an issue related to some of the applets that prevents proper interactions with these. This also includes the Network Manager applet. In order to still connect to a WLAN it is possible to use the nmcli command line tool:

nmcli d wifi connect "SSID" password "PASSWORD"
Posted in Announcements, Misc. | Tagged , , , , , | 35 Comments

Automatically clone all repositories defined in conf/gitolite.conf

In this post, I post a simple, hackish script to clone all repositories defined in a gitolite config file. There may be various reasons why one should want to clone a bunch of repositories at a time, e.g., in case one is working with a bigger project composed of several independent components or to simply create a backup of repositories. No matter what the reason is, this script could be handy in such a case:

#!/bin/bash
#
# Copyright 2013, Ruediger Gad <r.c.g@gmx.de>
#
# This work is licensed under the Creative Commons Attribution-ShareAlike 3.0 Unported License.
# To view a copy of this license, visit http://creativecommons.org/licenses/by-sa/3.0/
# or send a letter to Creative Commons, 444 Castro Street, Suite 900, Mountain View, California, 94041, USA.
#
#
#
# Script to automatically clone repositories defined in a gitolite config file.
#
# Example:
# initial_repository_checkout.sh ssh://git@foo.com [my_gitolite_config.conf]
#
# The first command line parameter is the URL where the repositories are located at.
#
# The path to the gitolite config can be given as last command line parameter.
# If the path is not given conf/gitolite.conf is used as default path.
#
#
# Please note that this script expects the repo line to start with "repo"
# without any preceding whitespace and to contain exactly one space between
# the "repo" keyword and the path of the repository.
# You can adjust this behavior by tweaking the grep command in the REPOS_LINES assignment.
# This only works for repositories that are explicitly defined via a repo entry.
#

if [ $# -eq 0 ]
then
    echo "Please specify at least a server URL where the repositories are located."
    exit
fi

SERVER_URL=$1

if [ $# -eq 1 ]
then
    GITOLITE_CONFIG=conf/gitolite.conf
    echo "Using default path to gitolite config: ${GITOLITE_CONFIG}"
else
    GITOLITE_CONFIG=$2
fi
echo "Using ${GITOLITE_CONFIG} to get repo lines."

REPO_LINES=$(grep "^repo [a-Z]" ${GITOLITE_CONFIG} | sed 's/^repo //')

for rl in $REPO_LINES
do
    if [ $(echo $rl | grep "/") ]
    then
        dir=$(dirname $rl)
        echo "Found repository in subdirectory. Creating parent directories first: $dir"
        mkdir -p $dir
        cd $dir
        echo "Checking out: $rl"
        git clone ${SERVER_URL}/$rl
        cd -
    else
        echo "Checking repository out: $rl"
        git clone ${SERVER_URL}/$rl
    fi
done

This script can be run again after more repositories were added to the gitolite config. It will simply not clone the already checked out repositories again. In this case, you can safely ignore the error messages.
For updating the cloned repositories you can use the script I posted here earlier.

Posted in Snippets | Tagged , , , | 1 Comment

KDE Lock Screen vs. Touch Input

With respect to touch input, most parts of KDE can be handled very easily. However, one, imho, very important aspect, simply lacks all touch UI support: the lock screen (and also the login screen), right now, do not support touch UIs at all.

There is a somewhat recent bug report that requests the addition of virtual keyboard support to the lock screen but so far it seems that no solution is available yet. Personally, I was very surprised that such an, imho, important feature like a “proper” touch UI lock screen, is not available in KDE. Even the touch-optimized plasma-mobile/Plasma Active doesn’t offer a proper touch UI lock screen. With “proper” I mean a lock screen that really offers security features.

I played a little around and could at least get a KDE lock screen that shows an on-screen keyboard. My approach was to use Maliit in combination with the stock KDE lock screen. I am using Fedora as Linux distribution and installed Maliit as follows:

yum install maliit-plugins maliit-framework-qt4

The next step is to start the lock screen with Maliit as input method. This can be done manually as follows:

QT_IM_MODULE=Maliit /usr/libexec/kde4/kscreenlocker_greet

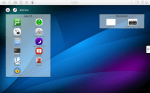
Once the lock screen is shown, clicking in the input field opens the Maliit on-screen keyboard. Note that this only works when run for the first time, when the maliit-server is started when the input field is clicked. Subsequent attempts on using this command line do not show the Maliit keyboard on the lock screen. Reason is that the lock screen is implemented such that it covers all other windows, including the virtual keyboard. The fact that the keyboard is shown on the first run may be a bug in the lock screen but I am not sure about this.

The fact that the on-screen keyboard is shown on the first invocation already gives a hint for a temporary solution. Killing all maliit-server processes before using above command line fixes the observed issue.

Right now, I use this hack as workaround. I created a shell script for killing maliit-server and starting /usr/libexec/kde4/kscreenlocker_greet. Then, I added a quick launch widget to my desktop for running the script. So, the result for me is that I can finally lock the KDE desktop and unlock it via an virtual on-screen keyboard.

This is quite a hack. I am event not sure how long this will work, assumed that the “workaround” presented here may be, in fact, (partly) a bug. However, I think, this hack already shows one possible solution. The only thing that needs to be done is to allow to display Maliit keyboards on the lock screen; allow to show the Maliit virtual keyboard window above of the lock screen.

Furthermore, I experimented with replacing the kscreenlocker_greet binary with a shell script. I moved kscreenlocker_greet to kscreenlocker_greet_bin and created a shell script named kscreenlocker_greet which calls the renamed binary with QT_IM_MALIIT being set. This way, all the built-in lock actions make use of this new approach. Unfortunately, when being called this way, the Maliit keyboard is shown underneath the lock screen; i.e., after unlocking via the normal keyboard, the Maliit on-screen keyboard is visible. As far as I understand, this is the intended way of how kscreenlocker should work and is a security feature; no other application are allowed to be shown on top of the lock screen. However, if it would be great if there was a way to define an exception to that such that the Maliit keyboard can be displayed in the lock screen. Then this whole issue could simply be solved by using the Maliit input method for the lock screen executable.

Maybe, a similar solution could be used to enable an on-screen keyboard for KDM. However, I didn’t look that much into this right now.

Posted in Misc., Snippets | Tagged , | 6 Comments

Zotero on Nexus7 in Plasma Active, Updated

I put a little more work into running Zotero on Plasma Active tablets. First of all, it is now possible to install Zotero via zypper. You can get Zotero from my xulrunner branch repository on Mer OBS. Furthermore, it now comes with a .desktop file; so, you can start Zotero like any other application.

Another improvement is that the font size, even in the menus is bigger now. For this, I added quite a hack to xulrunner; you can find the according patch also in the project on Mer OBS. Unfortunately, there are still issues with respect to rendering the menus but at least they are now shown at the correct positions; one does not have to guess the position of items anymore.

Additionally, I upscaled the smaller icons to 32×32 which seems to be a good size at least for Nexus7. Last but not least, the synchronization arrow icon is upscaled while still being animated. Upscaling the animated PNG, in fact, took the most time of all this.

Here are some new screenshots. I purposely made one screenshot that shows the menu rendering issue; the menu is somewhat translucent and only the text is painted.

Overall, I am quite happy as it is right now. There are still issues and probably lots of things can be improved; having proper touch gestures and multi-touch support, e.g., would be awesome. But at least it turns out to be quite usable right now. I suggest that you install Okular along with Zotero. From my experience Okular works very well for viewing the stored *.pdf files.

Posted in Announcements, Misc., Other Software | Tagged , , , , | 1 Comment

Note to self: Resize animated PNG (APNG)

Interestingly, animated PNG (APNG) files seem to be so scarce that neither Gimp nor ImageMagick support this format. In fact, it took me quite a bit of searching until I found a way to scale an animated PNG preserving the animation (Gimp and ImageMagick can at least open respectively resize APNGs but only the first frame.).

For resizing an animated PNG I used the APNG assembler, disassembler, and ImageMagick. The workflow was as follows:

./apngdis animated.png
for i in *png ; do convert $i -resize 32x32\< $i ; done
./apngasm output.png apngframe00.png 1 25 /f
Posted in Misc., Other Software, Snippets | Tagged , , , | Leave a comment

Zotero on Nexus7 in Plasma Active

Zotero, in a nutshell, is a pretty sophisticated literature management tool. It lets you, “… collect, organize, cite, and share your research sources.” In this post I briefly present how I got Zotero running on the Nexus7 tablet in Plasma Active.

Please note that this is a first proof of concept and that there are still many usability issues. However, this demonstrates that it is, generally, possible to run Zotero also on alternative architectures. Personally, my intention is to use Zotero this way while commuting and it should actually suffice for this purpose.

Zotero consist of two parts, a client and a server side. The client side is the user frontend. The server is used as backend for archival and synchronization. The client application is available as browser-plugin and standalone application. I got the standalone version running in PA on Nexus7.

Technically, the Zotero standalone version is a XULRunner application; the Zotero standalone client application itself does not contain any platform dependent code. So, to get Zotero running in PA on Nexus7 an armv7hl version of XULRunner is needed. Luckily, there is already a XULRunner package available in the Mer repositories.

For convenience, I branched the xulrunner version I am using plus some dependencies in a separate project on the Mer OBS. So, in order to get xulrunner and its dependencies it should be enough to add that repository and “zypper in xulrunner”.

The Zotero installation is straight forward. Firstly, a Zotero standalone archive has to be downloaded and extracted. After extracting the Zotero standalone application, one finds a xulrunner directory in there. This can be safely deleted as we are using the xulrunner from Mer. Furthermore, the “zotero” binary is useless for us as it has the wrong architecture. The remaining directory can be simply copied to the Nexus7, e.g., via SSH.

To run Zotero simply execute “xulrunner application.ini” in the directory that contains the application.ini and zotero.jar files. In my case I had to edit application.ini in order to adjust the xulrunner version. Below are some screenshots of Zotero running in PA on Nexus7 and Okular showing a paper from the Zotero database.

Note that I increased the font size via the Zotero preferences. Additionally I extracted the zotero.jar content and increased the icon sizes such that they are easier to hit on the touch screen (find . -name “*png” -exec convert {} -resize 48×48\< {} \;). Also note that some drop-down menus are not shown and other drop-down menus are shown in wrong places such that clicking some entries is rather a matter of anticipation or luck but as said this approach still has many issues. Fortunately, the sync feature, at least via WebDAV, seems to work well and opening *.pdf files from the Zotero database works as well. Nonetheless, you have been warned, the user interface on Nexus7 PA, right now, has quite a number of glitches. For me, it is already great to have Zotero with it’s “full” feature set available on a tablet.

Maybe, this proof of concepts motivates others to look into this as well and improve the user experience on touch interfaces. A nice aspect of this approach is that the official Zotero application is used and thus the application will benefit from the Zotero development and updates. Feedback and comments are, as usual, always appreciated. Please let me know if you are also interested in using Zotero on your Plasma Active, or Mer in general, enabled device. Last but not least, this should also apply to Plasma Active on ArchosG9 but I didn’t test it.

Posted in Other Software | Tagged , , , , , | 1 Comment

Nexus 7, Linux, Accelerometer, sensorfw

This is just a brief wrap up about a patch I just submitted: in a nutshell, this patch enables the practical use of the acceleration sensor on Nexus 7 in Linux.

Thanks a lot to Glueckself who posted a first guide on how to manually read data from the Nexus 7 accelerometer to the Mer wiki: https://wiki.merproject.org/wiki/Community_Workspace/Tegra3/Nexus7#Accelerometer_.2F_Gyroscope This, however, does not enable the practical usage of the sensor in apps.

In order to make practical use of the sensor, additional software, like sensorfw/sensord is needed. The cool thing about sensorfw/sensord is that once a sensor works there, it also works in QtMobility and thus works in all apps that utilitze QtMobility.

Following is a small video that shows the Stellarium N9 app as well as the “show-acceleration” command line application from the QtMobility examples:

Please note that, right now, the accelerometer sensor has to be manually enabled after each boot the way Glueckself described. For convenience, the require steps are described below (Executed as root.):

cd /sys/devices/platform/tegra-i2c.2/i2c-2/2-0068/iio\:device0/
echo 10 > buffer/length
for i in scan_elements/in_*en ; do echo 1 > $i ; done
echo 1 > buffer/enable

Similarly to the description by Glueckself linked above, the magnetometer can be accessed in sysfs here: “/sys/devices/platform/tegra-i2c.2/i2c-2/2-000e/iio:device1” Unfortunately, getting the magnetometer to work is much more complicated. Additionally to the adaptor for reading the raw data from the sensor, in this case, also a chain implementation, namely the compasschain, is needed. According to this post there are legal issues with an older compasschain implementation that prohibit it’s publication.

So, to get the magnetometer running, at least an adaptor and a chain must be implemented. The chain seems to be the more complicated part. My understanding is that, amongst others, the chain performs some processing of the data that allows the easy consumption of the data by other software pieces like QtMobility. Probably the first step to coming up with such a chain implementation is to have a specification of what the output data should look like. Unfortunately, I couldn’t find any information about this yet. Any helpful insights are highly appreciated.

Posted in Announcements, Other Software | Tagged , , , , , | Leave a comment

GTK+ Editable Menu Accelerators

One never stops learning. I was reminded of this just very recently when I discovered a very cool feature of GTK+ which I wasn’t aware off even though I have been using Linux-based OS as my main OS for more than 10 years now.

With editable menu accelerators it is possible to astonishingly easily change menu short cuts for actions directly in menus. For this to work gtk-can-change-accels=1 has to be added to the ~/.gtkrc-2.0 file. When this is in place menu short cuts in GTK+ applications can be changed simply by hovering with the cursor over a respective entry and pressing a new short cut. With backspace short cuts can be deleted. I found this information from the Xfce FAQ.

Posted in Announcements, Other Software | Tagged , , | Leave a comment

Plasma Active: Current Devel Snapshots for ArchosG9 and Nexus7

This is just a very quick announcement that new rootfs tarballs of the current development branch of Plasma Active are available for ArchosG9 and Nexus7. These snapshots are not made based on Mer latest but on an older version. Additionally, to the stock Plasma Active installation these tarballs contain my nemo-compatibility package as well as some Nemomobile apps to show the general practicability of running Nemomobile apps on Plasma Active. The rootfs tarballs are available here:

http://files.kde.org/plasma/active/3.0/images/archos-g9/armv7hl/plasma-active-armv7hl-archos-gen9-pvr-devel-2013-07-17.tar.gz

http://files.kde.org/plasma/active/3.0/images/nexus7/plasma-active-armv7hl-nexus7-devel-2013-07-17.tar.gz

The .ks files from which these tarballs had been generated are available here:

http://files.kde.org/plasma/active/3.0/images/archos-g9/armv7hl/plasma-active-armv7hl-archos-gen9-pvr-devel-2013-07-17.ks

http://files.kde.org/plasma/active/3.0/images/nexus7/plasma-active-armv7hl-nexus7-devel-2013-07-17.ks

Please note that the Nexus7 version needs a manual change that is currently not included in the .ks file: The setting for QT_GRAPHICSSYSTEM in /etc/sysconfig/nemo-mobile-ui needs to be changed from “opengl” to “raster”.

Please also note that there is still a nasty bug that causes the Network Manager applet to be unusable. A workaround for connecting to a secured WLAN is, e.g., to use nmcli instead: nmcli d wifi connect “SSID” password “PASSWORD”. As it seems this problem only occurs with the armv7hl versions (ArchosG9 and Nexus7), the Intel based images are reported to work correctly. Any information on solving this issue is highly appreciated.

Posted in Announcements | Tagged , , , , , , | Leave a comment